Installation and Starting Up
1. Pick your IDE:
- Arduino Cloud (via your browser). Sign up for an account on the Arduino website. You may need to disable ad blockers and install the appropriate agent, so your browser can communicate with your board. The cloud account makes it easier to load libraries, share the code and doesn’t need as much software on your computer, but communicating with your board may be more challenging.
- Desktop. You can download the software here. Although it requires a few more steps, I find this version allows for greater control and fewer headaches if things get more complicated.
2. Start up your IDE and plug in your Arduino. Create a new sketch.
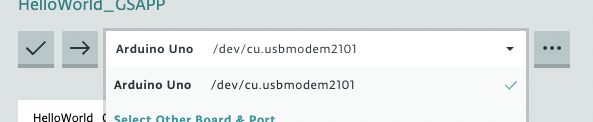
3. Select the appropriate board from the dropdown. You may want to restart your IDE if you don’t see it. From personal experience, make sure you use a USB cable that can communicate two ways (many can’t!).
Now that you’re up and running, let’s jump into simple code to explore the structure of Arduino. Go to part 2!