Endless Blink
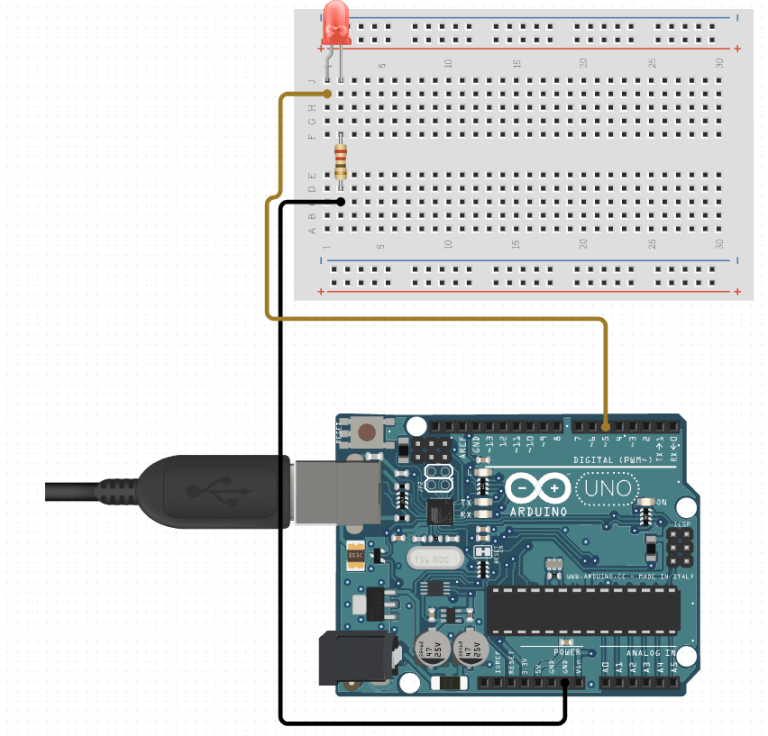
Now we’ll do a simple “Hello, World” using hardware by making an LED blink. Use the following wiring diagram and code to make an LED blink. Note that the wiring involves extra pieces here so that we can explain different parts in class.
You’ll need the following from your hardware kit:
- single color LED (here, we’ll use red)
- 220 ohm resister
- breadboard
- 2 x cables
Wire your board as follows, and use the code below. You may have to adjust the pin variables based on where you wire into the board.
// the setup function runs once when you press reset or power the board
void setup() {
  // initialize digital pin LED_BUILTIN as an output.
  pinMode(5, OUTPUT);
}

// the loop function runs over and over again forever
void loop() {
  digitalWrite(5, HIGH);   // turn the LED on (HIGH is the voltage level)
  delay(1000);                       // wait for a second
  digitalWrite(5, LOW);    // turn the LED off by making the voltage LOW
  delay(1000);                       // wait for a second
}
Note that once you’ve uploaded this code, there isn’t communication with your computer as the board only counts down the time and adjusts the voltage. What if we want to “sense” the environment? We’ll explore that with a photocell in Part 4!